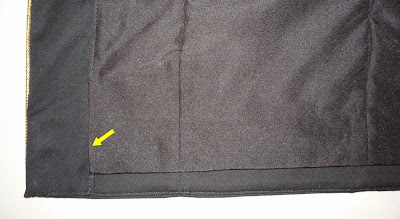
Turn the front/zipper/neckline facings outward.
Turn the hem facings upward (including the bottom portion of the front/zipper facing).
Sew the underturned portion of the front/zipper facing to the facing along the upper and inside edges.
Hand sew the hem facings to the underlining.
Turn the front/zipper/neckline facing back under.
Hand sew the front/zipper facing to the hem facing at the bottom of the jacket where the two overlap.
OPTIONAL: If you were unable or did not wish to serge the facing edge for some reason, or if you wish to further prevent fabric unraveling, apply liquid fray preventer to the edge you just sewed.
OPTIONAL: To prevent your facings from flapping about, hand sew the facing/lining seam allowances to the underlining.
Pull up the bottom of the lining so the its raw edge and seam line are flush with those of the hem facing.
Slip stitch the lining assembly bottom to the jacket bottom, matching seams and leaving the centermost edges free for the time being.
Press the excess lining downward, forming a jump pleat.
Slip stitch the front edge of the lining to the front facing along the lower edge and press.
Slip stitch the sleeve lining to the sleeve at the top of the sleeve facing.
To do this, we find it easiest to turn the bottom of the sleeve inside out and pin in place before sewing.
Lastly, hand sew a hook-and-eye closure (or two) to the top of the front/zipper facings where the zipper was left hanging free.
PREVIOUS: Tutorial, part 18 - Lining to Body
NEXT: Tips to Achieve an Ideal Fit
PREVIOUS: Tutorial, part 18 - Lining to Body
NEXT: Tips to Achieve an Ideal Fit


No comments:
Post a Comment