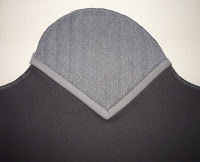
NOTE: If you have the original version of our pattern (the one with the full sleeve cap instead of the V-shaped top), you'll need to do a quick modification before continuing, but don't worry, it's easy!
The original pattern had a sleeve piece that looked like this:
Using a see-through ruler, draw a new cutting line ¾" above the edges of the shoulder point alignment guide.
Now cut out your sleeves along the new line and proceed.
See? That wasn't bad!
 |
| All too easy. |
Stay-stitch the lower corner at the top of the sleeve, where the shoulder point will be attached, about ⅝" to ¾" from the edges, and clip the sleeve vertically from the corner to the stay-stitch's pivot point.
Using your zipper/piping foot, sew the shoulder point to the sleeve with ¾" seam allowance, with the open/raw edge of the trim flush with the upper edge of the sleeve.
TIP: Place a pin in the trim, vertically, where the "center" quilt line and miter are, to mark exactly where the pivot point of the shoulder point is, and align this pin with the clip on the sleeve. Stop stitching at the bottom of corner of the shoulder point (where the pin is), then, with the needle still in the fabric, lift the presser foot and rotate the sleeve so that the other sleeve edge is flush with the remainder of the trim, lower the presser foot, and continue stitching.
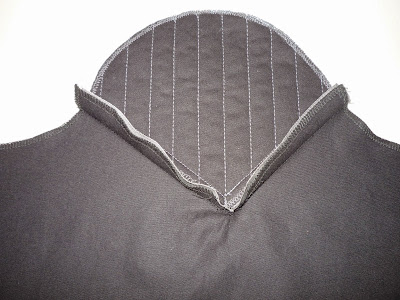
Ideally, your sleeve should look like this immediately after stitching:
However, it'll probably look more like this ...
And you'll feel like this:
But don't worry! A sleeve even this "bad" can be salvaged with very little effort, and we'll show you how.
Steam and press the area directly beneath the corner of the shoulder point.
If steam doesn't get the job done, you may want to lightly spray a bit of water on the area and press it again.
One way is to clip the seam allowances, as shown above, which has the advantage of reducing some bulk, which is pretty much always a plus when it comes to handling many layers on a sewing/tailoring project.
The other is to simply fold the excess trim out of the way, which has the advantage of being slightly faster, though admittedly not by much.
 |
| It buys us, like, one second. |
Whichever method you choose, pin the seam allowances upward from the right side along the upper edge of the shoulder point trim.
"Stitch in the ditch" using your quilting/walking foot and gray thread, securing the seam allowances underneath.
Here's how the undersides will look for both methods afterward.
|
|
As a finishing touch, we recommend interfacing the area directly beneath the bottom corner of the shoulder point to keep it looking nice, flat, and crisp.
Cut a small, rectangular piece of lightweight or midweight fusible interfacing (about 2" x 1" or so).
We recommend cutting it with pinking shears ("pinking" it), thus minimizing the effect of strong, linear imprints on the right side of the garment where the edges of the interfacing are, better obscuring them.
Make sure the fabric area beneath the shoulder point is wrinkle-free, then fuse the interfacing strip to the wrong side of the sleeve. We recommend placing one of the pinked wedges directly beneath the bottom corner of the shoulder point, as high as possible.
This interfacing is a subtle touch, and, theoretically, if you've done a good job with the sleeve thus far, you might not even "need" it; here is a picture of the same sleeve before and after the interfacing was applied.
|
|
As you can see, the difference is subtle - especially when the finished garment is worn and moving - but it is a genuine improvement and helps keep it looking nice by preventing future wrinkling beneath the shoulder point.
Repeat for the other shoulder point/sleeve.
PREVIOUS: Tutorial, part 8 - Shoulder Point Trim
NEXT: Tutorial, part 10 - Sleeves
PREVIOUS: Tutorial, part 8 - Shoulder Point Trim
NEXT: Tutorial, part 10 - Sleeves


No comments:
Post a Comment